
A Complete Guide to Mastering SLA in Zendesk
Master your SLA in Zendesk with this complete guide. Learn to configure, manage, and optimize SLA policies to improve customer support and team performance.Think of a Zendesk SLA as a promise. It’s the guarantee you give your customers about how fast you’ll get back to them and solve their problems.
It’s just like a pizza place promising your pie will arrive hot in 30 minutes or less. It sets a clear, measurable expectation that keeps your support team on track and accountable.
What Are Zendesk SLAs and Why Do They Matter?
A Service Level Agreement (SLA) is so much more than a simple timer on a ticket—it's the foundation of a customer support operation people can trust. It takes fuzzy goals like "good service" and turns them into concrete commitments you can actually track. When you define these promises, you create a mutual understanding with your customers, which is the secret sauce for building real loyalty.
Without SLAs, support can feel like a total black box. Customers are left in the dark, wondering if and when they'll ever hear back. Agents, on the other hand, are often staring down a massive queue of tickets with no clear way to prioritize them. An SLA policy slices right through that confusion, giving everyone a clear roadmap of what needs attention and when.
Putting this structure in place pays off in a few huge ways:
- Boosts Customer Satisfaction: When you set clear expectations, you get happier customers. It’s that simple. Knowing their issue will be looked at within a specific window reduces their anxiety and builds confidence in your brand.
- Sharpens Agent Focus: SLAs basically hand your agents a prioritized to-do list. The visual countdowns help them zero in on the most urgent tickets first, making sure critical issues don’t get lost in the shuffle.
- Provides Data-Driven Insights: Tracking SLA performance isn't just about putting out fires before they happen. It gives you a goldmine of data that can reveal process bottlenecks, show you where your team might be stretched thin, and point to clear opportunities for improvement.
Zendesk's SLA feature is built to measure performance with specific targets like First Reply Time (FRT) and Total Resolution Time (TRT). These policies even use little color-coded badges on tickets that change from green to amber and finally to red when a breach is about to happen or has already occurred. It’s a simple, visual cue that gives your team an at-a-glance understanding of what to do next.
These features are available starting with the Suite Professional plan, and more advanced options like Group SLAs come with the Suite Enterprise plan. Ultimately, this system transforms abstract promises into a powerful tool for fine-tuning your entire support operation.
The Building Blocks of a Zendesk SLA Policy
Think of a good SLA in Zendesk like a recipe. You need the right ingredients, mixed in the right order, to get the result you want. Each part plays a critical role in making a reliable promise to your customers. Understanding these core components is the key to building policies that actually work for your team and keep customers happy.
Let's break down what goes into a Zendesk SLA.
This diagram shows how these moving parts come together. A solid SLA isn't just about timing tickets; it's about building trust, measuring performance, and gaining real insight into your support operations.
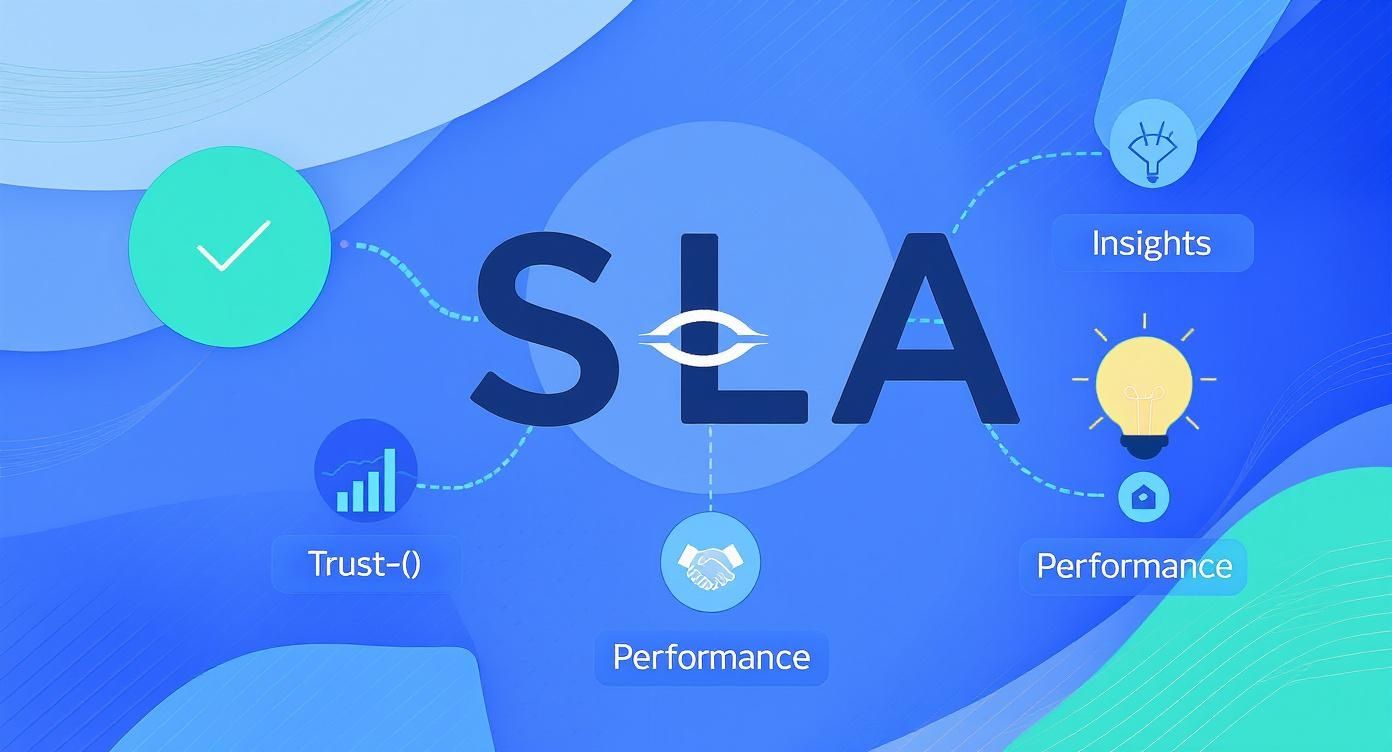
As you can see, the central promise of your SLA connects directly to major business goals, turning your service commitments into a real driver for customer loyalty.
Defining Your Targets
At the heart of any SLA are the targets. These are the specific, measurable time goals you set for your team. They answer a simple question: "How fast do we need to be?"
While Zendesk offers several metrics, most teams lean heavily on a few core targets to gauge their service quality. They turn vague goals like "fast responses" into concrete numbers that everyone can understand and work toward.
Here’s a look at the most common metrics you’ll be setting up in your policies.
Zendesk SLA Target Metrics Explained
| SLA Metric | What It Measures | Why It's Important |
|---|---|---|
| First Reply Time (FRT) | The time between a ticket's creation and the first public reply from an agent. | This is your first impression. A fast FRT tells customers, "We've got your message, and we're on it." It's a huge factor in customer confidence. |
| Next Reply Time | The time between a customer's follow-up comment and the agent's next public reply. | Keeps the conversation moving. This target ensures ongoing discussions don't fall through the cracks after the initial response. |
| Total Resolution Time (TRT) | The entire lifespan of a ticket, from the moment it's created until it's marked as "Solved." | This is the ultimate measure of efficiency. It shows how quickly your team can fully solve a customer's problem from start to finish. |
| Requester Wait Time | The total time a ticket is in a "New," "Open," or "On-hold" status. | This metric smartly pauses the clock when you're waiting for a customer's reply, giving you a truer picture of your team's active work time. |
These metrics give you a clear, data-driven way to track performance and ensure no ticket gets left behind.
Applying Conditions and Hours
Of course, not all tickets are the same. A system-down emergency from a VIP client is a bit more pressing than a simple "how-to" question. This is where conditions come in.
Conditions are the "if-then" rules that tell Zendesk which SLA policy to apply to which ticket. You can build rules based on almost any ticket detail, such as:
- Priority: Is it Urgent, High, Normal, or Low?
- Channel: Did it come from email, chat, phone, or a web form?
- Customer: Is this a VIP client or a standard user?
- Ticket Form: Was a specific form used, like "Bug Report" or "Billing Inquiry"?
This is how you create tiered service levels. For instance, you could set a 1-hour FRT for an Urgent ticket but a 24-hour FRT for a Low priority one. This directs your team's attention where it's needed most.
One of the most common mistakes I see is a "one-size-fits-all" SLA. Trying to apply the same rules to every single ticket is a recipe for disaster. You'll either burn out your agents or leave your most important customers waiting.
Finally, you have to decide when the clock is actually ticking. Zendesk lets you define your operating hours and measure targets in either business hours (e.g., Monday-Friday, 9 AM to 5 PM) or calendar hours (24/7).
This is a critical setting. Choosing business hours ensures the SLA timer automatically pauses overnight, on weekends, and during holidays. This gives you an honest, accurate picture of your team's performance during their actual working hours, without penalizing them for tickets that arrive at 2 AM on a Saturday.
How to Configure Your First SLA Policy
Alright, let's move from theory to practice. This is where the real power of a Zendesk SLA comes to life. Now that you've got a handle on the core components—targets, conditions, and hours—we're going to build your first policy from scratch. This hands-on walkthrough will show you how to create a foundational rule for a super common, high-impact scenario.
Our goal is simple: create an SLA policy that applies to all 'High Priority' tickets. This is how you make sure your team’s most urgent customer issues get the immediate attention they deserve, turning a service promise into a measurable reality.
Step 1: Define the Conditions
Think of conditions as the gatekeepers for your SLA. They’re the "IF" statements that decide whether a policy should even look at a ticket. For our example, the condition is nice and straightforward.
We only want this policy to trigger when a ticket's priority field is set to "High." That's it.
- Head over to your Zendesk Admin Center.
- Navigate to Objects and rules > Business rules > Service Level Agreements.
- Click Add policy.
- Give your policy a clear, descriptive name, like "High Priority Tickets."
- Under Conditions, set the rule to Meet ALL of the following conditions.
- Select Ticket: Priority > Is > High.
This simple rule tells Zendesk to apply this specific SLA only to tickets marked as high priority. It will ignore everything else for now.
Key Takeaway: The order of your SLA policies really matters. Zendesk stops at the first policy that matches a ticket's conditions. Always drag your most specific or important policies to the top of the list so they get triggered first.
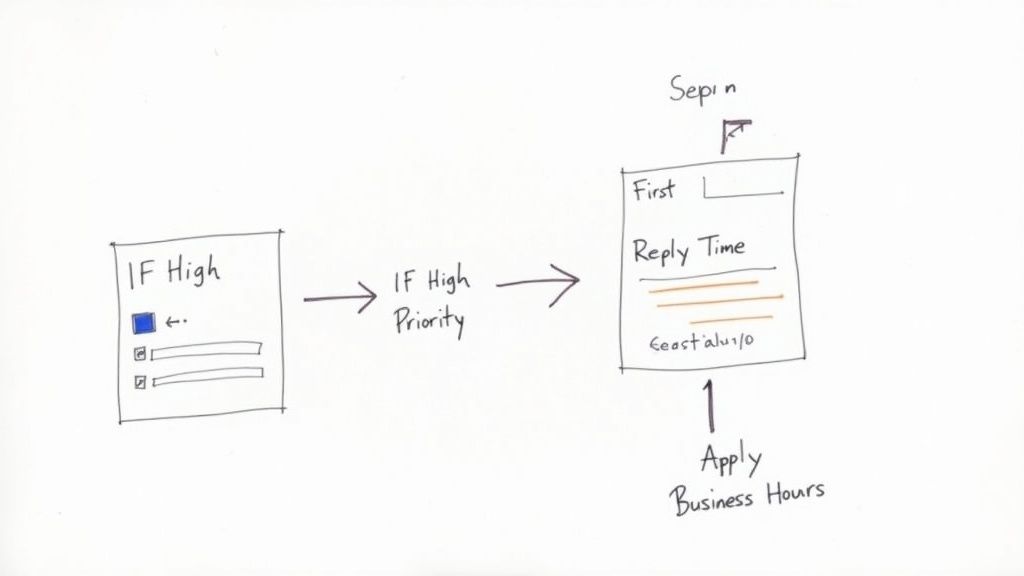
Step 2: Set Your Targets
With the "IF" statement sorted, it's time for the "THEN" part of the equation—setting the targets. These are the time-based goals your agents must meet for any high-priority ticket. This is where you get to define what "fast service" actually means in minutes or hours.
Let's establish some clear, aggressive targets for these critical issues.
- First Reply Time (FRT): 1 hour in Business Hours. This guarantees a customer gets a swift initial response, letting them know you're on the case.
- Total Resolution Time (TRT): 8 hours in Business Hours. This sets a hard deadline for actually solving the problem from start to finish.
In the policy editor, you'll add these targets one by one. You just select the metric, punch in the time, and choose "Business hours." This is crucial because it ensures the SLA clock pauses when your team isn't working, giving you a fair and accurate way to measure performance.
This is a great little sketch of how the logic works behind the scenes.
On an actual ticket, these targets appear as a visual timer—a powerful tool that helps agents prioritize their queue at a glance and focus on tickets that are closest to breaching.
Once you save this policy, you've officially created an automated system for managing your most critical support requests. From now on, every new high-priority ticket will automatically get this SLA, holding your team accountable and giving your customers a consistent, reliable experience.
Fine-Tuning Your Service with Advanced Group SLAs
Moving beyond a one-size-fits-all approach is where your support team really starts to excel. A single, company-wide SLA policy is a solid start, but as your business grows, you'll need more granular control. This is where Group SLAs in Zendesk become a total game-changer, turning your service promises from a blunt instrument into a set of precision tools.
Think of it like this: a standard SLA is a general speed limit for the entire city. It works, but it doesn't account for the difference between a quiet school zone and a six-lane highway. Group SLAs let you set different speed limits for different areas, making sure you apply the right urgency to the right situations.
This feature is perfect for teams juggling diverse customer needs or handling requests from various internal departments. You can create entirely separate service promises for different teams.
- VIP Customer Support: Give your most valuable clients a premium experience with a guaranteed 30-minute first reply time.
- Technical Support: Acknowledge that complex bugs take time. Set a more realistic resolution target, like 24 hours, for issues that require deep investigation.
- Sales Inquiries: Don't let a hot lead go cold. Ensure pre-sales questions get a fast response with a 2-hour reply time.
This level of control helps you use your resources much more effectively. You can focus your best agents on the tickets that truly matter most.
Customizing Service by Team and Priority
The real power of a Group SLA in Zendesk is how it reflects the reality of a modern business. Instead of forcing your technical team to meet the same aggressive targets as your front-line support, you can build policies that actually make sense for their day-to-day work. This is crucial for scaling your support without burning out your agents or letting quality slip.
By looking at your past ticket data, you can set realistic goals for different teams and priorities. For example, you might set a very strict First Reply Time for high-priority tickets assigned to your senior agents while allowing a bit more breathing room for routine issues handled by junior staff. You can find more practical advice on optimizing support with Zendesk Group SLAs on knots.io.
When you align your service promises with actual customer impact, SLAs stop being a static, contractual chore. They become a strategic tool for running your operations better—a system for continuous improvement, not just a way to track failures.
Ultimately, Group SLAs help you deliver a more thoughtful and personalized customer experience. It shows your customers that you get it—you understand their needs and are committed to providing service that reflects their importance to your business. This is how you build a support framework that doesn't just meet expectations, but consistently exceeds them.
Common Zendesk SLA Problems and How to Fix Them
Even a perfectly tuned Zendesk setup can throw you a curveball. It's incredibly frustrating when you've spent hours crafting your SLA policies, only to find they aren't working the way you expected. More often than not, these issues aren't bugs—they're just quirks in how Zendesk’s logic operates.
Let's walk through some of the most common headaches people run into with their SLA in Zendesk. We'll cover everything from policies that refuse to apply to timers that seem to have a mind of their own, so you can stop scratching your head and get things fixed.
Why an SLA Policy Fails to Apply
This is probably the number one issue: you create a new policy, and it just doesn't trigger on the right tickets. Nine times out of ten, the culprit is either the order of your policies or a simple mistake in the conditions.
Zendesk reads your list of SLA policies from top to bottom. The very first time it finds a policy that matches a ticket's conditions, it applies it and stops looking. So, if you have a broad, catch-all policy sitting at the top of your list, Zendesk will never even get to your new, more specific rule further down.
Here's a quick fix:
- Check Your Policy Order: Go to your SLA policies and simply drag your most specific rules to the top. Think VIP customers or "Urgent" tickets—they should always come first.
- Verify Your Conditions: Read every single condition in your policy again, carefully. A classic slip-up is choosing "Meet ALL of the following conditions" when what you really needed was "Meet ANY of the following conditions."
Understanding Fluctuating SLA Reports
Have you ever pulled a report for last month's performance, only to check again a week later and see different numbers? It's not a glitch. It’s actually a feature of how Zendesk handles data.
Your SLA data isn't set in stone. It can, and will, change as tickets get updated. For instance, a ticket that was marked "Solved" might be reopened, or a customer might reply to an old thread, and these actions can retroactively alter historical metrics.
A report might show your team's average First Reply Time was 10 hours last month. But next week, that number might dip to 9.7 hours because a few older tickets were finally updated. You can learn more about how Zendesk reporting data evolves over time.
Key Takeaway: Think of your historical SLA reports as living documents, not static snapshots. Actions you take on old tickets today can absolutely refine the data for past periods, giving you a truer picture of performance over the long run.
This dynamic system ensures that as tickets move through their entire lifecycle, your analytics always reflect the most accurate, up-to-date reality of how well your team is meeting its service promises.
Proven Strategies to Reduce SLA Breaches
Consistently hitting your SLA in Zendesk isn’t about frantically watching countdown timers. It's about building a proactive rhythm into your daily operations. You want to prevent breaches before they even have a chance to happen, and that comes down to a smart mix of configuration, clear processes, and the right tools. Think of it as creating a system where hitting your targets is just the natural result of how your team works.
The first step? Set goals that are both challenging and realistic. Dive into your Zendesk Explore reports and get a feel for your team's actual performance. If your median first reply time is hovering around 45 minutes, suddenly demanding a 15-minute turnaround is just setting everyone up for failure. A much better approach is to aim for incremental improvements—maybe start with 35 minutes—and tighten things up as your team gets into the groove.
This data-first mindset ensures your SLAs are a source of motivation, not frustration.
Automate Prioritization and Escalation
Automation is your best friend in the fight against SLA breaches. Zendesk’s built-in tools are incredibly powerful for flagging tickets that need a little extra TLC before their timers run out.
You can build automations that act as an early warning system. For instance, you could set up a rule that:
- Sends a notification to a specific Slack channel when a high-priority ticket has only 30 minutes left on the clock.
- Automatically reassigns a ticket to a team lead if it's been sitting unanswered one hour before a breach.
- Adds a tag like
sla_at_risk, which pushes the ticket into a special high-visibility queue for your agents.
These automated safety nets take the guesswork out of the equation. They create clear escalation paths so that at-risk tickets get the attention they need, and everyone knows whose job it is to step in before it’s too late.
The goal isn’t just to track time; it’s to make that time count. Effective SLA management is about creating efficiency so your team can beat the clock without feeling rushed or overwhelmed.
Integrate AI for Instantaneous Response
Let's be honest: a lot of SLA breaches, especially for First Reply Time, happen for one simple reason—a human wasn't free the second a customer reached out. This is exactly where an AI call agent like CallCow can be a game-changer.
By answering inbound calls 24/7, an AI agent makes sure every single customer interaction is captured instantly. It can ask the initial questions, create a perfectly detailed ticket in Zendesk, and get the SLA clock ticking right away, all without an agent lifting a finger. This means your team starts their work with all the information they need, allowing them to resolve issues faster and nail even the tightest SLA targets.
Zendesk SLA FAQs: Your Quick Guide
Let's wrap up with some quick answers to the questions that almost always come up once you start working with SLAs in Zendesk. Think of this as your go-to cheat sheet for navigating those common "what if" scenarios.
What Happens if a Ticket Matches Multiple SLA Policies?
Good question. When a ticket fits the criteria for more than one SLA policy, Zendesk doesn't get confused—it just applies the first one it finds on your list.
This is why ordering your policies is so important. You'll want to place your most specific or highest-priority rules right at the top to make sure they get applied first.
Can I Change an SLA Policy After It’s Been Applied?
Yes, you can absolutely edit an SLA policy whenever you need to. But here’s the catch: the changes will not apply retroactively to tickets that already have the old policy on them.
Your new and improved rules will only kick in for brand new tickets or for existing tickets that get updated in a way that triggers a fresh SLA evaluation.
How Do "Paused" Statuses Affect SLA Timers?
When you put a ticket into a status like 'On-hold' or 'Pending,' the SLA clock stops ticking. Metrics like Total Resolution Time are effectively frozen.
The timer only starts back up when the ticket is moved into an active status, like 'Open.'
This is a crucial feature. It ensures your team's performance is measured fairly—based only on the time they were actively expected to be working on the issue.
Never miss another call or breach another First Reply Time SLA. CallCow answers calls 24/7, captures vital information, and creates detailed Zendesk tickets instantly. Get started for free at CallCow.